Absolutely, you can roast coffee with a popcorn popper! These affordable devices can produce deliciously fresh coffee beans. Just choose a model with a metal chamber and side vents for ideal airflow. You’ll want to use about 3 to 4 ounces of green coffee beans, and the entire roasting process takes just around five minutes. Roasting outdoors helps manage the chaff mess. Excited to learn how to perfect your coffee roasting technique and discover more about the whole process?
Key Takeaways
- Yes, air popcorn poppers can effectively roast coffee beans, making them a popular choice for home coffee enthusiasts.
- Choose models with metal chambers and side air vents to ensure proper heat circulation and prevent bean loss during the roasting process.
- For optimal results, use 3 to 4 ounces of green coffee beans and monitor roasting times closely to achieve your desired flavor profile.
- Outdoor roasting is recommended to manage chaff mess and minimize smoke, ensuring a pleasant roasting experience.
- Sourcing quality green beans from specialty retailers or local roasters enhances both the roasting process and the final flavor of your brewed coffee.
The Basics of Popcorn Poppers for Coffee Roasting
When it comes to roasting coffee at home, a popcorn popper can be your secret weapon. An air popcorn popper, especially one with a metal chamber and side air vents, is an affordable and effective choice, usually costing $25 or less.
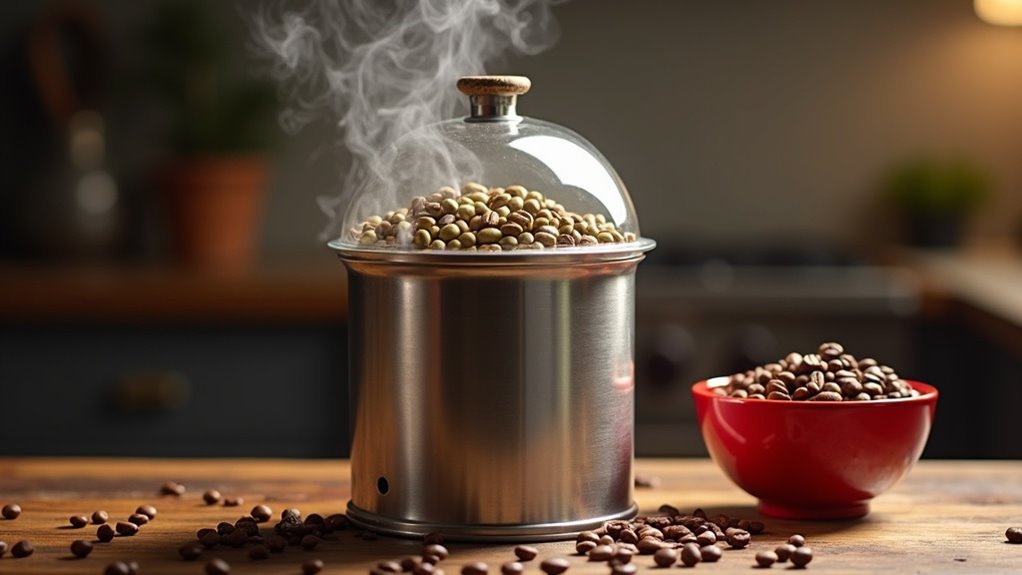
To achieve the best roast level, use 3 to 4 ounces of green coffee beans—about 1/4 to 1/3 cup. The roasting process takes around 5 minutes, with beans reaching 360-370°F before the first crack.
Remember to roast outdoors to manage the chaff mess, and consider adding a thermometer for precise temperature control. Enjoy crafting your perfect brew and enhancing your coffee experience!
Essential Equipment for Home Roasting
To roast coffee at home effectively, you’ll need a reliable air popcorn popper, such as the West Bend Air Crazy, which features metal chambers and side air vents for optimal heat circulation.
Pair it with a thermometer that can measure temperatures of at least 450°F, as well as cooling trays or colanders to ensure your beans cool quickly and avoid over-roasting.
Additionally, don’t forget to have an airtight container on hand to store your freshly roasted beans, helping to keep them fresh and flavorful for your next brew.
Required Popcorn Popper Features
If you’re considering roasting coffee at home, selecting the right popcorn popper is crucial for achieving that perfect roast.
Look for models with metal chambers and side air vents; these features ensure proper airflow and heat circulation during the roasting process. The West Bend Air Crazy is a popular choice among coffee enthusiasts for its effective design.
Additionally, make sure your popcorn popper has a solid bottom to prevent beans from falling out during roasting.
Be aware that using a popcorn popper for coffee roasting may void the manufacturer’s warranty, so consider this risk before embarking on your home roasting journey.
Enjoy the process and the flavorful results!
Additional Useful Tools
Once you’ve got the right popcorn popper, there are a few more tools that can enhance your coffee roasting experience.
A reliable thermometer is essential for monitoring temperatures, ensuring your coffee roaster delivers consistent results.
A kitchen scale helps you measure your beans precisely for uniform roasting.
For cooling, use colanders or bowls to quickly drop the temperature of your beans and remove chaff.
A cotton cloth can catch that pesky chaff, simplifying your cleanup.
Finally, store your roasted beans in an airtight container after letting them offgas CO2 for 12 hours to preserve their freshness and flavor.
The Roasting Process Step-by-Step
As you begin your exciting journey of roasting coffee with a popcorn popper, the first step is to fill the machine with 3 to 4 ounces of green coffee beans, ensuring not to exceed the maximum fill line for optimal results. Turn on the popper and keep a close eye on the beans. Listen for the first crack around 2.5 to 3 minutes at a temperature of 360-370°F. Stir the beans if necessary to achieve an even roast. Once you hear the crack, you can stop for a light roast, or allow the roasting to continue for darker flavors. After roasting, cool the beans quickly in colanders to prevent over-roasting.
| Action | Time |
|---|---|
| Start roasting | 0 minutes |
| Listen for first crack | 2.5 to 3 minutes |
| Cool beans | Immediately after roasting |
Understanding Roast Levels
Understanding roast levels is essential for crafting the perfect cup of coffee.
By closely monitoring the roasting time after the first crack, you can achieve your desired flavor profile.
Each roast level, from light to French, brings its own unique characteristics, allowing you to explore a rich spectrum of taste and aroma in your coffee experience.
Roast Level Indicators
How can you tell when your coffee has reached the perfect roast level? The timing of the first crack is your key indicator. At around 360-370°F, listen closely; it’ll happen in about 2.5 to 3 minutes.
For a light roast, stop just five seconds post-crack. A medium roast takes an extra 20 seconds, while a medium-dark roast requires 40 seconds more.
For a bold dark roast, extend it by a full minute. If you’re feeling adventurous, a French roast needs 90 seconds after the first crack.
Mastering these indicators lets you roast coffee to your perfect flavor profile!
Achieving Desired Roast
When you’re passionate about brewing the perfect cup of coffee, understanding the nuances of roast levels can make all the difference.
Using an air popper, start by roasting outside for safety. For a medium roast, stop 20 seconds after the first crack to create a balanced flavor.
If you prefer a medium-dark roast, extend that time by 40 seconds; this enhances the richness of your coffee. For a bold dark roast, let it go for 60 seconds, or even 90 seconds for a French roast, which delivers a deep, smoky taste.
Experimenting with these times will help you master the art of achieving your desired coffee roast every time.
Cooling and Storing Your Roasted Coffee
Once you’ve roasted your coffee beans, it’s important to cool them quickly to stop the roasting process and preserve their vibrant flavors.
Pour the beans into a colander or bowl to facilitate cooling and prevent over-roasting. After cooling, allow the roasted coffee to offgas CO2 in a loosely closed container for about 12 hours.
Then, transfer the beans to an airtight container to maintain freshness. Remember to label your storage with the roast level and date.
For the best taste, try to use your freshly roasted coffee within 8 days, as quality starts to decline after this period.
Enjoy the rich flavors of your coffee while they’re at their peak!
Tips for Consistent Roasting Results
After cooling and storing your freshly roasted coffee beans, achieving consistent roasting results becomes your next goal.
To master home coffee roasting with your popcorn popper, keep these tips in mind:
- Understand your popper’s temperature range and capacity for a perfect roast.
- Watch closely during roasting; adjust coffee amounts based on performance.
- Guarantee proper ventilation to minimize smoke and maintain air quality.
Experiment with roast levels, noting times after the first crack to refine flavors.
By monitoring ambient temperature and humidity, you’ll create a consistent environment that enhances your coffee roasting experience.
Enjoy the journey of perfecting your brew!
Common Mistakes to Avoid
While the allure of roasting your own coffee at home with a popcorn popper is undeniable, there are common mistakes that can derail your efforts and compromise the quality of your brew.
First, avoid using too many beans; stick to 3 to 4 ounces to ensure an even roast. Always prioritize monitoring the roasting process—listen for the first crack and stop promptly to achieve the desired flavor profile.
Avoid overcrowding your popper; stick to 3 to 4 ounces for an even roast and listen for the first crack to perfect your brew.
It’s also beneficial to install a thermometer for precise temperature control and roast in a well-ventilated area to prevent smoke buildup that can affect the taste.
Finally, don’t forget to cool your beans quickly by pouring them between colanders, and store them in an airtight container away from moisture to maintain freshness.
Sourcing Quality Green Coffee Beans
When you embark on the exciting journey of roasting your own coffee, sourcing quality green coffee beans is crucial for achieving the perfect brew. Here are some options to help you find the best green beans:
- Specialty retailers such as Sweet Maria’s offer a great selection of high-quality, fair trade beans at reasonable prices.
- Local coffee roasters often carry fresh green stock, allowing you to support your community while enjoying premium quality.
- Online marketplaces and subscription services present curated selections from various coffee-growing regions, making it easy to explore different flavors.
Don’t forget to store your green beans in an airtight container, away from light and heat, to maintain their freshness.
With the right beans, you’ll elevate your home coffee experience to new heights of delight.